Introduction
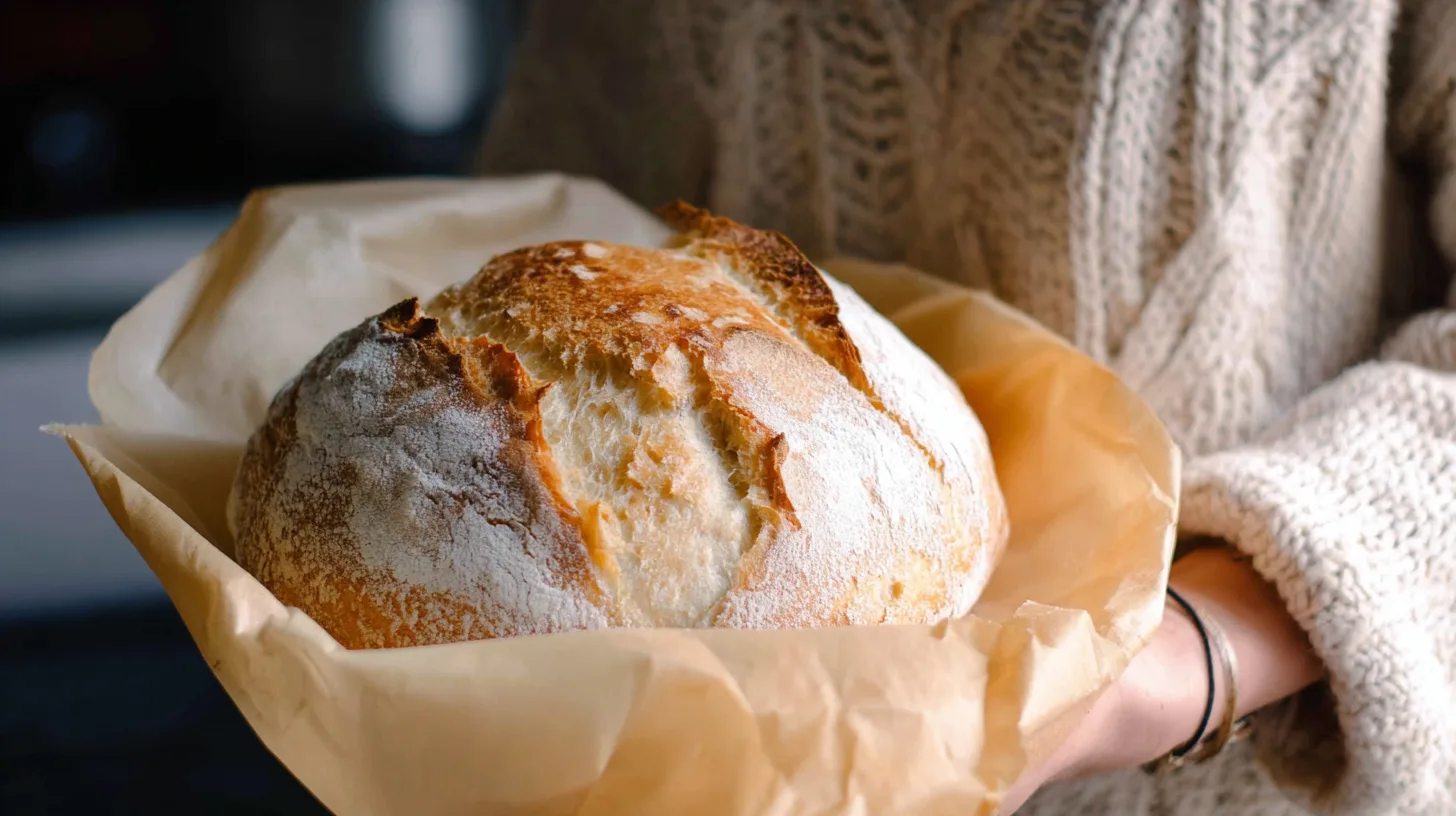
Sourdough bread is a timeless, fermented bread made with a natural leavening agent – a sourdough starter. There’s nothing quite like the aroma and taste of freshly baked, crusty sourdough bread straight from your own kitchen. This comprehensive guide will walk beginners through every step, helping you achieve a perfect loaf and experience the pure joy of homemade baking.
Why You’ll Love This Sourdough Bread Recipe
You’ll adore this recipe for many reasons! It taps into the ancient goodness of fermented foods, offering health benefits like improved digestibility and gut health. Every bite brings a delightful tangy, complex flavor that is simply irresistible. Baking sourdough bread at home is also incredibly therapeutic and a rewarding experience, transforming simple ingredients into something extraordinary. Plus, your homemade loaf will elevate any meal, from simple toast to gourmet sandwiches.
Ingredients
To bake incredible sourdough bread, you’ll need just a few simple ingredients. All-purpose flour is a great starting point for its accessibility and consistent results. An active sourdough starter is absolutely crucial; it’s the heart of your bread, providing both flavor and rise. Water at the right temperature helps activate the yeast and develop the dough. Finally, salt is essential for flavor and structure, so don’t skip it!
Notes & Substitutions
For different textures and flavors, you can experiment with bread flour for a chewier crumb or whole wheat flour for added nuttiness and nutrients. Keep in mind that different flours absorb water differently, so you may need to adjust your water slightly. If you don’t have a starter yet, you’ll need to create one, which typically takes about a week of consistent feeding. A healthy, active starter is key to successful sourdough bread.
Equipment
You don’t need a lot of fancy tools to make amazing sourdough bread. A large mixing bowl is essential for combining all your ingredients. A kitchen scale is highly recommended for accuracy, as baking is a science. A Dutch oven is the secret to a perfectly crispy crust and even baking. While optional, a dough scraper can be very helpful for handling sticky dough. A banneton (or proofing basket) is also optional but great for shaping and professional-looking loaves. Finally, a lame or razor blade is needed for scoring, and parchment paper prevents sticking.
Instructions
Making delicious sourdough bread is a journey, not a sprint. Follow these steps for success:
Activate Starter: Feed your sourdough starter 4-12 hours before you plan to mix your dough. It needs to be active and bubbly, floating in water, to ensure a good rise.
Mix Dough (Autolyse): In a large mixing bowl, combine the 325 grams of warm water, 100 grams of active starter, 10 grams of salt, and 475 grams of all-purpose flour. Mix with a wooden spoon or your hands until no dry spots remain; it will be shaggy. Cover the bowl with plastic wrap or a lid and let it rest for 30 minutes. This rest allows the water to fully hydrate the flour, a process called autolyse.
First Rise (Bulk Fermentation):
- Initial Stretch and Folds: After 30 minutes, grab the edge of the dough and gently pull it up, stretching it out. Fold the stretched dough back towards the center of the bowl. Rotate the bowl a quarter turn and repeat this process two more times. This completes one “round” of stretch and folds.
- Subsequent Stretch and Folds: Cover the dough and let it rest for another 30 minutes. Repeat the stretch and fold round.
- Final Stretch and Folds: After another 30-minute rest, complete one last round of stretch and folds.
- Bulk Fermentation: Cover the bowl with a lid, damp towel, or plastic wrap. Allow the dough to bulk ferment in a warm place until it has roughly doubled in size. This can take anywhere from 6 to 12 hours, or even longer, depending on your kitchen temperature and starter activity. Be careful not to let it over-ferment, as this can weaken the dough.
Shape Dough: Lightly dust a clean work surface with flour. Gently ease the dough out of the bowl onto the prepared surface. Fold the dough onto itself, then gently cup your hands around it and spin it towards you to create a round shape. If desired, let the shaped dough rest uncovered for 15-20 minutes to form a slight “skin,” which helps prevent sticking during proofing. Now, perform the final shaping by folding two sides of the dough over to meet in the middle, pinching them together. Repeat with the remaining two sides. This creates surface tension for better oven spring.
Second Rise (Cold Proof): Transfer the dough, seam side up, into a floured banneton or a bowl lined with a floured tea towel (rice flour works best to prevent sticking, but all-purpose flour is fine). Cover with plastic or place it in a large plastic bag and tie the ends. Refrigerate for 12-15 hours. This cold proof deeply develops flavor and makes the dough easier to score. Alternatively, you can do a room temperature rise for 3-4 hours, but the cold proof is highly recommended for the best sourdough bread.
Bake: About an hour before baking, preheat your Dutch oven inside your oven to 500°F (260°C).
Remove the dough from the fridge immediately before baking. Carefully turn the cold dough onto a piece of parchment paper. Dust the top with a little flour if you like.
Score the dough with a lame or a sharp razor blade. A single, deep expansion score is common, or you can add decorative smaller scores.
Using oven mitts, carefully transfer the parchment paper with the dough into the preheated Dutch oven. Place the lid back on and bake for 20 minutes.
Remove the lid (be careful of steam!) and reduce the oven temperature to 475°F (245°C). Continue baking for an additional 15-25 minutes, or until the crust is a deep golden brown and sounds hollow when tapped.
Cool: This is the hardest part! Transfer the baked sourdough bread to a wire rack and allow it to cool completely for at least 1-2 hours before slicing. Slicing too early can result in a gummy texture.
Pro Tips & Troubleshooting
An active starter is key for airy sourdough bread; make sure it’s bubbly and ripe before you begin. For dough hydration, resist the urge to add too much extra water, as it can make the dough difficult to handle. Bulk fermentation timing is crucial and depends heavily on your kitchen temperature. For scoring, a deep, single cut or a few artistic slashes will help your sourdough bread achieve its best oven spring. Use the windowpane test (stretching a small piece of dough얇게 until light passes through) to check for proper gluten development. The most common mistakes are over-fermenting or under-fermenting, so pay close attention to your dough’s behavior.
Serving, Storage, & Variations
Slice your freshly made sourdough bread and enjoy it with a smear of butter, alongside a hearty soup, or as the base for your favorite sandwiches. To store, keep your cooled loaf at room temperature, wrapped in a linen bag or beeswax wrap for up to 3-4 days. For longer storage, slice the bread and freeze it in an airtight bag for up to a few months, toasting slices as needed. For variations, try adding garlic and herbs to the dough, a generous sprinkle of cheese, or substituting a portion of the all-purpose flour with whole wheat for a richer flavor.
Nutrition
The nutritional content of sourdough bread can vary. A typical serving (about 56g) provides:
| Nutrient | Amount |
|---|---|
| Calories | 152 kcal |
| Carbohydrates | 32 g |
| Protein | 4 g |
| Fat | 0.4 g |
| Saturated Fat | 0.1 g |
| Polyunsaturated | 0.2 g |
| Monounsaturated | 0.03 g |
| Sodium | 325 mg |
| Potassium | 42 mg |
| Fiber | 1 g |
| Sugar | 0.1 g |
| Calcium | 7 mg |
| Iron | 2 mg |
Sourdough’s fermentation process can improve the availability of nutrients and aid digestion compared to regular bread. Research on fermented foods and gut health suggests that the fermentation process may enhance the nutritional profile and digestibility of grains.
FAQ
- What is sourdough bread? It’s a type of bread made from a fermented dough, using a natural starter instead of commercial yeast for leavening. This process gives it a distinct tangy flavor and unique texture.
- How do you make a sourdough starter? You create it by mixing flour and water, then feeding it regularly to cultivate wild yeasts and bacteria.
- Is it necessary to knead sourdough? No, traditional kneading isn’t strictly necessary; the stretch and fold technique effectively develops gluten without intensive labor.
- What flour is best for beginner sourdough? All-purpose flour is an excellent choice for beginners because it’s widely available and more forgiving.
- What are three top tips when making sourdough starter? Be patient, don’t give up on it quickly, and remember that a starter is rarely truly “dead.”
- What do I need to start making sourdough? Essential items include a bowl, kitchen scale, and a Dutch oven. Optional items like a banneton or dough scraper can be helpful.
- What is the secret to a good sourdough starter? An active, consistently fed, and peaked starter is the secret to strong sourdough bread.
- Why is sourdough difficult to make? Its perceived difficulty comes from the long fermentation times and the variability of a live starter, but with practice, it becomes very manageable.
Conclusion
Baking your own sourdough bread is a wonderfully rewarding experience that brings a unique flavor and incredible aroma to your home. With just a few simple ingredients and clear instructions, you can master this ancient craft. Don’t be intimidating; embrace the journey and soon you’ll be enjoying the unparalleled satisfaction of sharing homemade sourdough bread with your loved ones. Give it a try – you’ll be glad you did!
The Ultimate Guide to Baking Perfect Sourdough Bread
Ingredients
Equipment
Method
- Feed your sourdough starter 4-12 hours in advance to ensure it is active and bubbly.
- Combine water, active starter, salt, and flour in a large mixing bowl, mixing until just combined.
- Cover the dough and let it rest for 30 minutes to allow the flour to hydrate.
- Perform a round of stretch and folds by pulling up the edge of the dough and folding it into the center, rotating the bowl a quarter turn and repeating three more times.
- After 30 minutes, complete another round of stretch and folds, then cover and let the dough rest for another 30 minutes.
- Complete one final round of stretch and folds.
- Cover the dough and let it bulk ferment in a warm place until doubled in size, which can take 6-12 hours or longer, being careful not to over-ferment.
- Lightly dust a clean work surface with flour, then fold and roll the dough to shape it into a ball.
- Optionally, let the dough sit uncovered for 15-20 minutes to prevent sticking during the overnight rise.
- Turn the dough over and shape it by folding opposite sides to the middle, pinching them together to create surface tension.
- Transfer the dough to a floured banneton or a bowl with a floured tea towel, seam side up.
- Cover and refrigerate for 12-15 hours, or let it rise at room temperature for 3-4 hours.
- Preheat a Dutch oven to 500°F (260°C) for 1 hour.
- Remove the dough from the fridge, place it on parchment paper, and score it with a lame or razor blade as desired.
- Carefully transfer the parchment paper with the dough into the preheated Dutch oven, then cover and bake for 20 minutes.
- Remove the lid, reduce the oven temperature to 475°F (245°C), and bake for an additional 15-25 minutes until golden brown.


